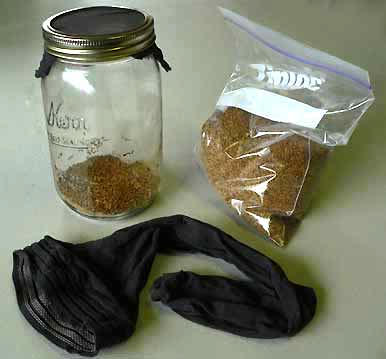
Above you see all you need to grow alfalfa sprouts:
- seeds
- glass jar
- stocking or similar woven fabric or screen
In the above picture a metal ring secures a patch from the lady's hose over the jar's mouth, but a rubber band or string does as well. You can use other kinds of woven fabric or screen. What's important is that air and water can pass through it, but the seeds can't. Note the small quantity of seeds in the jar. Just cover the bottom with seeds so you can't see glass beneath the seeds.
STEP 1:
Soak the seeds overnight. Fill the jar at least a quarter full with room-temperature water and just let the jar sit until it's time to rinse them.
STEP 2:
Pour out the water and let the seeds sit. You want the seeds to be wet yet have access to air. Therefore, don't let the seeds gather in clumps at the jar's bottom. In fact, take advantage of the fact that the wet seeds want to cling to the jar's inside surface. Roll the jar around, causing as many seeds to stick to the surface as possible, then lay the jar on its side. If the surrounding air is cooler than 70°F - 80°F (21-27C), the seeds will grow slower, but that's OK. Warmer temperatures encourage disease organisms. If you are growing them under warmer conditions you should rinse at least twice a day or more. If you are not rinsing enough, you'll smell a funky odor in the jar and need to rinse more often. At this stage it doesn't matter whether your sprouts have light or not, just don't put seeds still in the jar in direct sunlight, or they may get overheated.
STEP 3:
Rinse the seeds twice a day with cool water. Just run water into the jar, swirl the seeds around, then pour out the water through the top filter and repeat Step 2. The idea is to rid the seeds of disease organisms and toxins that accumulate because of moist conditions inside the jar.
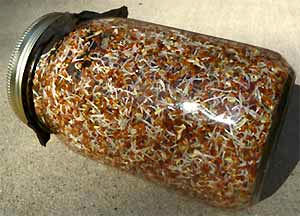
The above picture shows sprouting alfalfa seeds stuck to the side of a jar. The picture below shows the same jar appearing atop this page. Notice that the small amount of seeds began with now fill the jar with sprouts. If you've used too many seeds, you can transfer half the sprouts into another jar and continue the process.
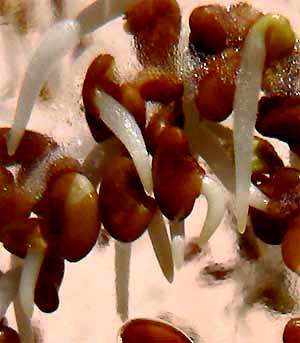
STEP 4:
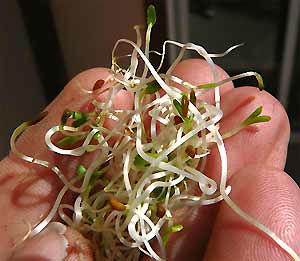
When the sprouts are big enough -- usually on the fifth or sixth day and looking like those above -- spread them out on a tray and let the sun shine on them a few minutes. They really don't need much sunlight to green up. This important step activates enzymes and makes the sprouts prettier by making their leaves greener. The brown seed-coats will have come off most beans. If you want, you can remove most of the coats by submerging the sprouts in water, then filtering out the coats, which tend to float to the top. Removing the coats won't change the taste or nutrition.
STEP 5:
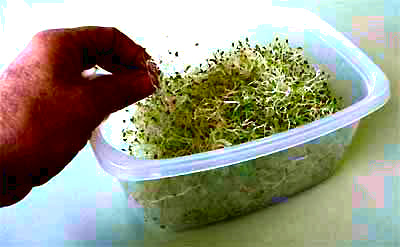
(You can refrigerate your sprouts once they've drained well.)
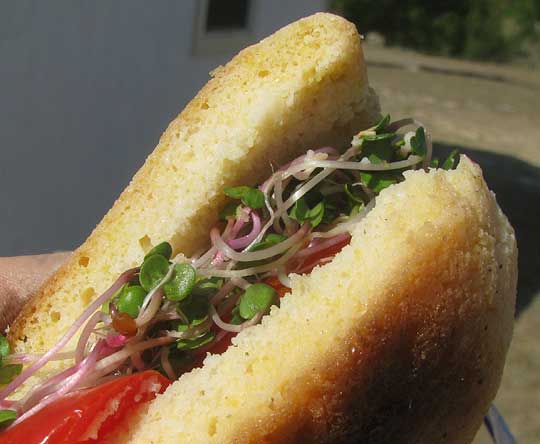
PS: Once you've mastered alfalfa sprouts, try sprouting radish seeds (avoid garden seeds that might be treated with pesticides) whose sprouts are larger, more colorful and with a radish or cress-like taste. Below you see radish sprouts with sliced tomato in a cornbread sandwich, an outside snack for a morning spent painting a house, and it was soooooo good!